 Create Films Sets In Photoshop
1.Getting started
I started with a sketch that I painted over a photo. I began by
replacing the sky, doing my sketch over several layers so I could place my new sky on top of my sketch and have the foreground elements overlap it. I like to work from back to front, dealing with one element of a sketch at a time.
2. Sky replacement
Using several photos, I extracted the sky from the image using Channels. In the Channels palette I selected the Blue Channel, which had the greatest contrast between the sky and the rest of the image. I duplicated this Channel by clicking and dragging it on top of the Create New Channel icon. With the duplicate channel selected, I typed Ctrl+M (PC) or Command+M
(Mac) to bring up the Curves palette and boost the lights and darks to create a strong silhouette. I cleaned up any stray specs using a hard edge brush, then held down Ctrl (PC) or Command (Mac) and right-clicked on the channel to create a selection. Next, by clicking Ctrl+J (PC) or Command+J (Mac) I extracted the sky from the photo. After combining several sky pieces, I dropped the resulting work into the scene, over my sketch.
3 Distant mountains
Using ‘distantMountains.psd’ on the DVD, I selected the Red Channel and duplicated it like I did in the last step. Using curves, I boosted the contrast, but not as much as I did for the sky extraction. By clicking and holding on the channel and then dragging it into my matte painting I had this new channel to use as a mask. On a new layer above my mountain sketch I added a light colour, sampled from the sky with the Eyedropper tool, and a soft brush. I painted in the highlights of the mountain. The Channel wasn’t exactly the same size as the mountains so I moved the mask around to work on different parts of the mountain.
4.Ground plane
I used the Lasso tool to extract some trees from a photo, for the area beyond the ridge. I used the Layer Mask again to soften the edges. To add the river, I sampled a light colour from the sky and with a standard chalk brush painted it in, on a new layer. Finally,on a new layer with a soft airbrush and the same light sky colour, I painted a soft haze along the base of my mountains to blend the ground plane and the mountains.
5.Rocky mountains
For the larger mountains I began by gathering bits and pieces of tree cover from several photos. I looked for similarland shapes to my sketch. I used my ground plane as a scale reference. Using the Eraser tool I cleaned up my edges to fit over the sketched mountain. For the rocky portions I used the same process but was careful to watch the scale of the rock texture so it was appropriate for the size and distance of the mountain.
6. Re-lighting
The mountains looked flat, so I needed to re-light them. First I duplicated my tree layer: one layer for shadows and the other for light. The shadow layer went underneath. Starting with the shadow layer I applied a colour overlay that was accessed by double-clicking the layer. I chose a dark colour from the sky and brought the transparency of the overlay down until it matched the colour of the shadowy parts of my ground plane. I used curves to reduce the contrast.
Source: www.imaginefx.com
Create Films Sets In Photoshop Ebook Pdf Download
Par,
 Creating a Stylized Wood Texture and Bump Effect Using Adobe Photoshop CS3 In this tutorial, we will go over the basics of creating a simple wood texture using Adobe Photoshop CS3 using filters and other various tools. We will then use Photoshop to “bake” in a bump effect, making the texture look like it is using a bump map even though it is only a diffuse map.
 2D to 3D Effects Using the Displace Filter in PhotoShop
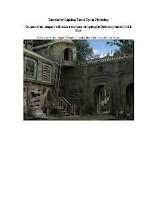 Tutorial for Lighting Touch Ups in Photoshop
 How to Use the Elliptical Marquee Tool
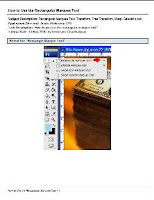 How to Use the Rectangular Marquee Tool
 Adobe Photoshop CS3 Extended’s 3D Tools

