 How to Use the Rectangular Marquee Tool
Subject Descriptors: Rectangular Marquee Tool, Transform, Free Transform, Warp, Selection tool.
Application (Version): Adobe Photoshop CS3
Task Description: How do you use the rectangular marquee tool?
Tutorial Date: 19 May 2009, by Arnousone Chanthalyxay
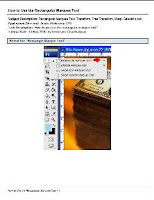
Select the "Rectangle Marque Tool"
Click and drag until the selection is the size that you desire.
- To subtract from the selection hold down "Alt" on your keyboard and then click and drag your mouse
over the selection that you want to deselect.
- To add to the selection hold down "Ctrl" on your keyboard and then click and drag your mouse over
the part of the image that you want selected.
- To rotate the selection move your mouse to the corner of the selection until it turns into a curved
arrow.
- Click and rotate the selection until the selection matches the angle of your image.
- Shrinking your image will let you see the selection that is outside your image borders.
- To shrink your image press Ctrl + 0 on your keyboard.
Source: it.usu.edu
How to Use the Rectangular Marquee Tool Ebook Pdf Download


Comments :
Posting Komentar