 Tutorial for Lighting Touch Ups in Photoshop
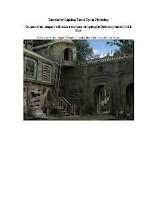
It is a little dark and flat, so to balance it out and bring about a more dramatic effect with the light I will adjust the levels in Photoshop. But before I do that I’ll need to copy the sky part of the image into another layer. If I don’t the sky will end up looking burned out: So, copy the top part of the sky and put it into another layer. I used the lasso tool for this step: This won’t get complicated, but it’s still good practice to name layers so I just named this Now back to the background layer. I adjusted the right input level from 255 to about 183. After this I usually add some contrast and adjust the color balance to add a warmer feel to the scene. It’s subtle, but makes a difference. For this image I added, +12 to the contrast and -5 to the yellow midtones.
Source: www.jg-art.com
Tutorial for Lighting Touch Ups in Photoshop Ebook Pdf Download


Comments :
Posting Komentar